
Barista Basics: How to Texture Milk
If your a beginner to the Coffe arts or barista Basics as some call it you might have heard of this little thing called Texturing milk,
and its one of the most important skills for coffee enthusiast to learn and master,
regardless if your making a latte cappuccino or just a flat white, if you manage to properly texture your milk you will get that sweet creamy and velvet mouthfeel,
and also make that stunning coffee art worthy of that instagram photo or the tiktok clip,
texturing milk may seem tricky at first, but with a little practice +Good technique,
Why Milk Texturing Matters
Before we dive into how to texture milk, let’s take a sec to talk about why it’s so important. Textured milk isn’t just about making your coffee look fancy—it adds a lot to the overall experience. Here’s why good milk texturing makes a big difference:
Enhances Sweetness: When milk is properly steamed, it brings out its natural sweetness, which helps balance the strong flavors of the espresso.
Creates Smooth, Velvety Texture: Well-textured milk has a silky, creamy feel that elevates the mouthfeel of your coffee, making it smoother and more enjoyable.
Allows for Latte Art: Once you get the hang of texturing, you’ll have the perfect microfoam to pour beautiful designs on top of your drinks. Latte art, anyone?
What You’ll Need
Before you get started with milk texturing, here’s a quick list of what you’ll need:
- Espresso machine with a steam wand
- Milk pitcher (preferably stainless steel with a spout for latte art)
- Fresh, cold milk (whole milk is great for beginners because of its higher fat content, but you can use alternatives like oat or almond milk too)
- Thermometer (optional, but helpful for beginners to get the right temperature)

Step-by-Step Guide to Texturing Milk
1. Start with Cold, Fresh Milk
The type of milk you use really matters. Whole milk is great for beginners because it gives you a creamy, rich texture, but you can also experiment with skim milk or plant-based alternatives like oat or almond milk. Just remember, different types of milk foam differently—whole milk makes a thicker, creamier microfoam, while low-fat and plant-based milks tend to create lighter, airier foam.
Fill your milk pitcher to about a third full, just below the spout, with cold milk. Using cold milk gives you more time to steam and stretch it before it hits the right temperature.
Ready for the next step? Let’s move on!
2. Purge the Steam Wand
Before you start steaming, purge the steam wand by releasing a quick burst of steam. This clears out any condensation, ensuring that you’re using dry steam, which is essential for properly texturing the milk.
3. Position the Steam Wand
Now, submerge the tip of the steam wand just below the surface of the milk. This positioning is super important for getting the right texture and microfoam.
For Latte Milk: You want to create a thin layer of silky microfoam. To do this, keep the steam wand just under the surface of the milk. You’re aiming for a small amount of foam, smooth and velvety.
For Cappuccino Milk: You’ll need more foam for a cappuccino. So, keep the steam wand slightly closer to the surface to introduce more air into the milk, creating a thicker foam.
To help distribute the air evenly, angle the steam wand slightly to create a whirlpool effect. This swirling motion helps smooth out the milk and gives you that perfect creamy texture.

4. Introduce Air (Stretching)
Now it’s time to introduce air into the milk, a process called stretching. Turn on the steam and gently move the steam wand slightly up and down so the tip is just at the surface of the milk. You’ll hear a faint hissing or “chirping” sound—that’s the air being incorporated into the milk.
This step should only last a few seconds. The goal here is to create tiny bubbles, known as microfoam, which gives your milk that silky texture.
Here’s what to keep in mind:
For a latte: You want less foam, so only stretch the milk for a short amount of time.
For a cappuccino: Stretch the milk a little longer to introduce more air and create a thicker foam.
5. Heat and Spin the Milk (Texturing)
After you’ve introduced enough air, it’s time to submerge the steam wand a bit deeper into the milk. This will allow the milk to spin and create a vortex, which helps break down the bubbles and gives you that smooth, velvety texture you’re looking for.
As the milk spins, it thickens and heats up. Keep a close eye on the temperature—ideally, you’ll want to stop steaming when the milk reaches around 140°F to 150°F (60°C to 65°C). If you don’t have a thermometer, no worries! You can use your hand to feel the pitcher. Once it becomes too hot to comfortably touch, that’s your signal that the milk is ready.
Now you’re all set to pour!

6. Turn Off the Steam and Wipe the Wand
Once your milk is ready, turn off the steam and carefully remove the wand from the milk. Right away, wipe down the steam wand with a damp cloth to clean off any milk residue. After that, purge the wand again with a quick burst of steam to clear any remaining milk from inside.
7. Tap and Swirl the Milk
Now that your milk is steamed, give the pitcher a few firm taps on the counter. This helps pop any large bubbles that may have formed during steaming. After tapping, swirl the milk around in the pitcher to mix the foam with the liquid, creating a shiny, silky texture that’s perfect for pouring.
Now you’re ready for that final pour!
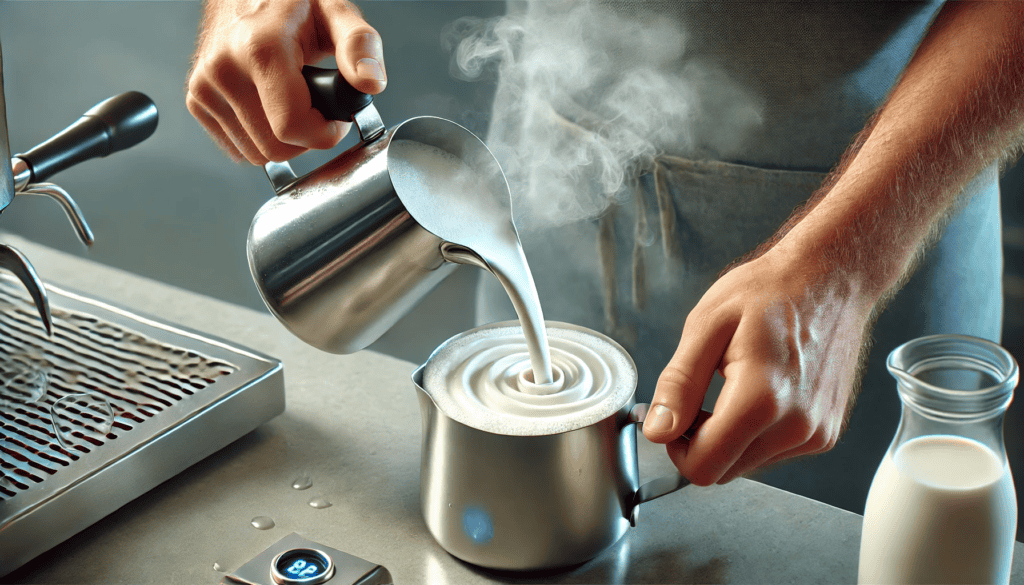
8. Pour Your Milk
Now for the fun part—pouring! Whether you’re making a latte or a cappuccino, start by holding the milk pitcher just above the cup of espresso and begin pouring slowly.
If you’re practicing latte art, tilt the cup slightly and pour in a steady stream to create your design.
- For lattes: Pour smoothly and evenly, aiming for a small amount of microfoam on top for that velvety finish.
- For cappuccinos: Pour more foam into the cup, creating a thicker, frothy layer on top for that classic cappuccino look.
And there you go—your perfectly textured milk is ready to enjoy
Tips for Success
Start with Whole Milk: Whole milk is easier to texture because its higher fat content creates a creamier, more stable foam. Once you get the hang of it, try experimenting with alternatives like oat milk, which also works well for latte art.
Practice Makes Perfect: Milk texturing takes time to master, so don’t get discouraged if your first few tries aren’t perfect. Keep practicing, and you’ll develop the right technique in no time!
Don’t Overheat the Milk: Overheating can make your milk taste burnt and lose its natural sweetness. Keep the temperature between 140°F and 150°F (60°C to 65°C) for the best flavor and texture.
Purge and Clean the Steam Wand Every Time: Always remember to purge the steam wand before and after steaming to avoid milk buildup and maintain cleanliness.
Watch Tutorials and Practice: Watching videos of professional baristas can help you better understand the timing, angle, and motion needed for perfect milk texturing.

Frequently Asked Questions (FAQs)
1. Can I texture non-dairy milk?
Yes! Non-dairy milks like oat, almond, and soy milk can be textured. Some plant-based milks froth better than others—oat milk is a favorite for its creamy texture, making it perfect for lattes and cappuccinos.
2. Why is my milk too foamy or bubbly?
If your milk is producing large bubbles or too much foam, it’s likely because you’ve introduced too much air. Try keeping the steam wand slightly deeper in the milk, and focus on creating small, controlled bubbles.
3. What temperature should I heat milk to?
Aim for a temperature between 140°F and 150°F (60°C to 65°C). This keeps the milk sweet and creamy without overheating it. Milk that’s too hot can taste burnt and lose its smooth texture.
4. Why does my milk separate after steaming?
If your milk is separating into foam and liquid, it’s likely because it wasn’t swirled properly after steaming. Make sure to swirl the milk in the pitcher to mix the foam and liquid together before pouring.
5. Can I steam milk without an espresso machine?
Yes! If you don’t have an espresso machine, you can heat milk on the stove and use a handheld milk frother or even a French press to create foam. While it won’t be exactly like using a steam wand, it can still work for home lattes and cappuccinos.
Conclusion: Practice Makes Perfect
Mastering the art of milk texturing is a must for any aspiring barista, whether you’re working at a café or just brewing at home.
It takes time and practice, but once you’ve nailed it, you’ll be whipping up beautifully textured milk with ease. Not only will your lattes and cappuccinos taste incredible,
but you’ll also step into the world of latte art.
So, grab that milk pitcher, fire up the steam wand, and start practicing! Before you know it,
you’ll be impressing your friends—and yourself—with perfectly textured milk and stunning coffee creations.